

Epoxy coatings are one of the most durable and attractive flooring solutions for garages, basements, workshops, and commercial spaces. However, the success of any epoxy floor installation depends heavily on proper concrete surface preparation. Without adequate preparation, even the highest-quality epoxy coating can peel, bubble, or fail prematurely. This guide will explain how to prepare concrete before installing epoxy coatings, why preparation is essential, and how professionals approach the process.
Why Concrete Preparation is Important for Epoxy Flooring
Concrete is naturally porous and contains tiny pores, dust, oils, and sometimes surface coatings that prevent epoxy from bonding properly. Proper preparation ensures:
- Strong adhesion between the epoxy and the concrete
- A smooth, level, and defect-free surface
- Elimination of contaminants that could cause peeling or discoloration
- Increased longevity and durability of the epoxy coating
Neglecting preparation can lead to costly repairs or complete installation failure.
Step-by-Step Process to Prepare Concrete for Epoxy Coating
Step 1: Inspect the Concrete Surface
Before any cleaning or grinding, inspect the concrete for cracks, spalling, moisture problems, or previous coatings.
- Look for oil stains or paint residue that must be removed
- Test for moisture using a moisture meter or plastic sheet method
If moisture is present, it must be addressed before applying epoxy.
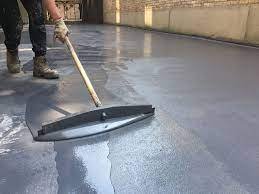
Step 2: Clean the Surface Thoroughly
Dirt, oil, and grease are enemies of epoxy adhesion. Use a degreaser or concrete cleaner to remove all surface contaminants.
- For oil stains, use a stiff brush with a concrete degreaser
- Rinse thoroughly with water and allow the surface to dry completely
Step 3: Repair Cracks and Surface Imperfections
Fill cracks and holes with a high-quality epoxy filler or patching compound. This prevents uneven surfaces and ensures a seamless finish.
Step 4: Remove Existing Coatings
If your concrete has old paint, sealers, or previous coatings, they must be completely removed. This can be done through mechanical grinding, shot blasting, or chemical stripping.
Step 5: Profile the Surface
Concrete profiling is essential for epoxy bonding. The surface should have a slight roughness (CSP rating of 2-3 as per ICRI standards). Common profiling methods include:
- Diamond grinding for a smooth but textured finish
- Shot blasting for heavily stained or industrial floors
Step 6: Test for Moisture Again
After cleaning and profiling, perform another moisture test to ensure there are no underlying issues that could damage the epoxy.
Step 7: Final Cleaning Before Application
Vacuum dust and debris within an industrial vacuum. The surface should be dust-free, dry, and ready for epoxy coating.
Recommended Concrete Preparation Tools and Methods
| Preparation Step | Recommended Method | Purpose |
|---|---|---|
| Degreasing | Concrete degreaser + brush | Removal of oils/grease |
| Crack Repair | Epoxy filler or patching | Smooth surface |
| Coating Removal | Diamond grinder or shot blaster | Expose concrete |
| Profiling | Diamond grinder | Improve adhesion |
| Final Cleaning | Industrial vacuum | Remove dust |
Case Study: Garage Epoxy Flooring in Brampton
A homeowner in Brampton wanted to transform their garage floor with a durable epoxy coating. The original surface had oil stains, small cracks, and an old sealer. Process followed:
- Oil stains were removed with a heavy-duty degreaser.
- Cracks were repaired with an epoxy patch.
- The old sealer was stripped using a diamond grinder.
- The concrete was profiled to CSP 3 for strong adhesion.
- Moisture levels were checked and within the safe range.
- Epoxy coating was applied, resulting in a flawless, glossy finish.
Outcome: The floor has withstood heavy vehicle traffic and chemical spills for over two years without peeling or discoloration.
Frequently Asked Questions
Q1: Can I apply epoxy on newly poured concrete?
Yes, but you should wait at least 28 days for the concrete to fully cure before applying epoxy.
Q2: Is acid etching enough for concrete preparation?
Acid etching can help open the pores of concrete, but mechanical grinding or shot blasting provides more reliable surface profile for epoxy bonding.
Q3: What happens if I skip concrete preparation?
The epoxy may bubble, peel, or fail within months, leading to costly repairs or reinstallation.
Q4: How long does concrete preparation take?
For a standard garage area, preparation can take 4 to 8 hours, depending on the condition of the concrete.
Q5: Can I prepare concrete myself?
DIY preparation is possible, but professional services ensure the correct surface profile, moisture control, and durability.
Final Thoughts
Concrete preparation is the most important step in installing epoxy flooring. Skipping or rushing this stage can lead to failure, no matter how expensive or high-quality the epoxy is. Proper inspection, cleaning, repair, coating removal, and profiling guarantee a strong and long-lasting bond.
If you want professional epoxy flooring installation with guaranteed results in Brampton and Toronto, contact Pro Renewal Services today for a free consultation.